How to Install and Configure Alacritty in Windows

Alacritty is one of the most popular terminal emulators in the market today. It delivers exceptional features with great performance. I like it the most because it is cross platform (it is available for Windows, Linux and Mac). It means that we only need to maintain one configuration file and we are good to go with any system that is given to us in a few minutes.
Need for this Article
This is a walk-through of how to install and configure Alacritty in Windows. The process of installation of a terminal emulator is supposed to be self explanatory but I am still writing this because I had some issues because of unclear documentation at the official Alacritty GitHub Page and Website. And I don’t want anyone else to have that problem. I also made a YouTube Video about it.
Installing Alacritty
This is the easiest part. You just have to go to the official Website or the Releases page of the GitHub profile of Alacritty and download the latest version of installer and install it with the installer wizard. You just have to agree to the Terms and Conditions and press install, it’ll take care of the rest.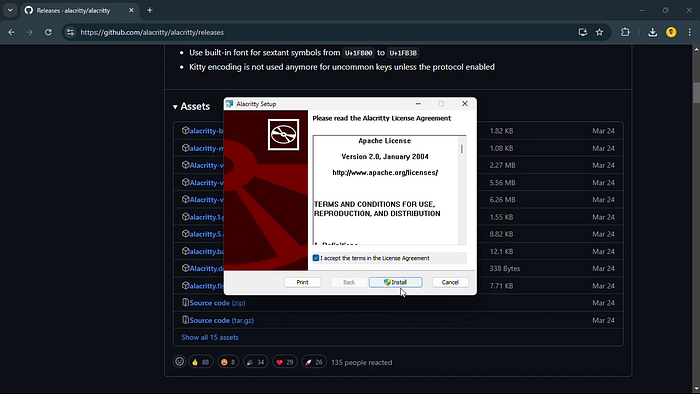
Installation screen of the wizard of Alacritty
Misleading Config File info
On the official Alacritty GitHub Page and Website, it is mentioned that, when you install Alacritty in windows, you will find an automatically generated alacritty.toml file on a certain path. I have installed alacritty on multiple systems now and I can assure you, that’s not the case. You HAVE to manually create that file.
Steps for Creating a config file:
- Press Windows+R and search for %appdata%
- You will be redirected to C:\….\AppData\Roaming\
- Create a folder named “alacritty”
- Inside that folder, create a text file called “alacritty.toml”
Customizing Alacritty
If you have previously worked with config files, from this step, there is not going to be a problem for you, just visit https://alacritty.org/config-alacritty.html to find all of the parameters that you can play with, till they suit your needs.
For those who are first time listening about a config file, let me elaborate. Configuration files can be treated as a replacement for settings menu for an app, instead of selecting from a drop-down or selecting radio buttons, you need to actually provide values to certain variables in config files to modify or add a feature to the app.
For instance, you can find documentation of the different variables/parameters provided for you to modify in the config file of Alacritty (alacritty.toml).
Note: Config file would be blank when you install or launch alacritty, you have to create it from scratch (or download someone else’s from the internet).
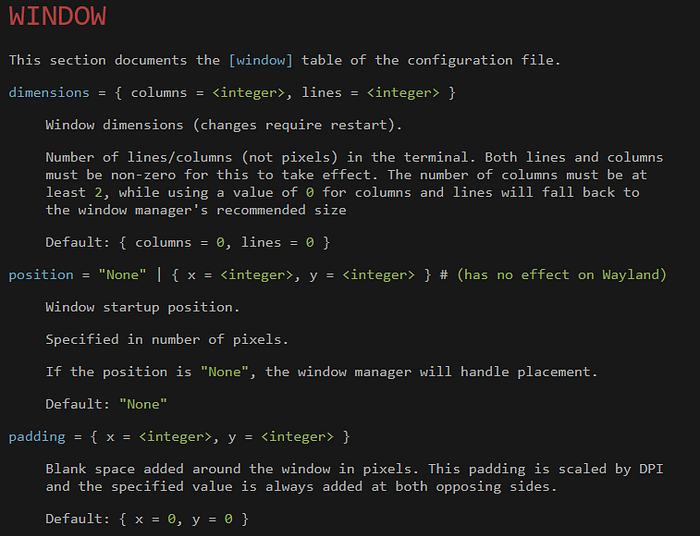
If I wanted to set the dimensions of app when it is launched, position of the window and padding of characters in the terminal, I can take help from the above-attached image of documentation from https://alacritty.org/config-alacritty.html and enter the below-mentioned text in the alacritty.toml file:
[window]
dimensions = {columns = 200, lines = 25}
position = None
padding = { x = 10, y = 10}
I would recommend adding the editor and the terminal side by side, so that, you can see the real-time effect of variables you change. You can disable by following snippet:
dimensions = {columns = 200, lines = 25}
position = None
padding = { x = 10, y = 10}
I would recommend adding the editor and the terminal side by side, so that, you can see the real-time effect of variables you change. You can disable by following snippet:

Comments
Post a Comment